Birds & Words

Saturday, September 27, 2014

Distress Photo Tinting

Meet Mollie.  Well, her name is Mary Margaret Brooks, but all her friends call her Mollie.  She was born in 1870 and saw the world change during her lifetime.  She grew up with her mother and 5 sisters in rural east Texas, and grew up without her father who never came back from the Civil War.  She was the baby of the family.

She worked hard all her life, loved her friends and family stubbornly, and laughed loudly.  She could tell a joke better than anyone but that didn't stop her from wanting to hear everyone else's funny stories.  At 94 she still had a mischievous sparkle in her eye.

She died just a few years after this photo was taken.  Strong to the end, she left this life suddenly.  But that's how she would have wanted it.  Strong to the end.
And.....  that whole story is made up.  This photograph came to me a few years ago from a friend who gave me a whole collection of vintage photos.  (Maybe that's why that's my favorite Distress color!!)  I've always been fascinated by this old girl.  I knew this is the picture I'd want to use for this challenge and my respect for "Mollie" has only grown as I've worked with her beautiful face.
This is a FABULOUS technique.  You can add such interest and life to these pictures.  Here's a before & after.  Amazing.  I promise you, I'll be doing this one again and again.  SO much fun. Learn this technique from page 41 of Compendium of Curiosities III.  
Note:
1.  I had best success taking my photograph to a copy store and having them print the photos on glossy paper.
2.  Using a tip from the talented Lady Ledbetter, I picked up just a pin dot of water with my color source and then tinted the photo.  That's all I'll say so as to not reveal Tim's technique, but this made all the difference in a good result for me.
 I used Tim's NEW Alphanumeric die set which is a "GOT-to-have-it".  I laid out the letters and then placed a piece of tape over the line of dies.  I picked them up and laid onto the tag,  cutting out the lettering and used the negative spaces on my tag for interest.
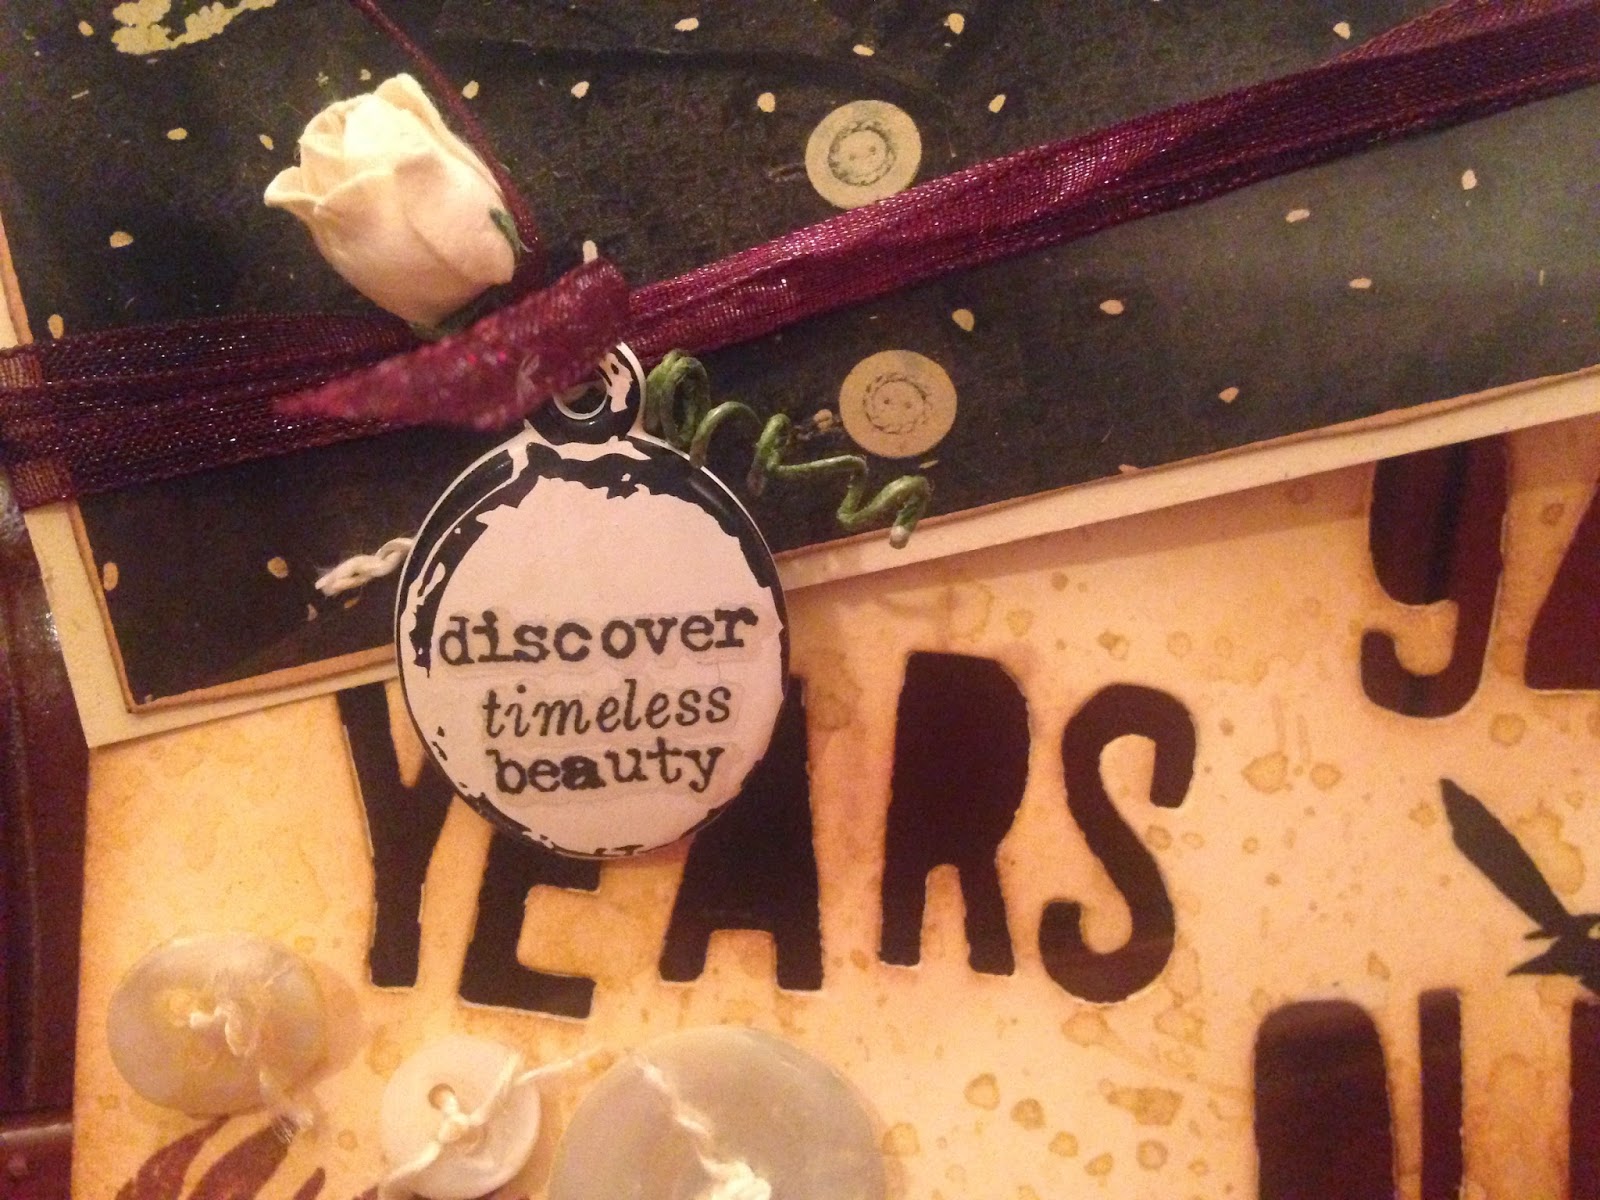
The wording came from the back of the photograph.  No name, sadly.
I used Tim's Remnant Rubs on Enamel Tags to create my messaging.  It made me think about myself and how much time and energy I give to coloring my hair, trying to keep fit, moisturizing my aging skin.  How relatively little time I give attending to timeless beauty.  Thank you, Mollie.  You've reminded me and encouraged me to be more deliberate to develop inner qualities of the soul.
I smile to think of the fun you'll have with this delicious technique!  Enter your art and gain a chance to win a Funkie Junkie gift certificate or a treasure trove of goodies from Tim Holtz!   Best thing to do is go to Linda Ledbetter's blog and get the game plan for entering and being eligible to win.  If you enter, it would be a SHAME not to be eligible to win, no?  Do this:
  • Include a link to CC3C
  • Include a link to the current sponsor, which is Funkie Junkie for this challenge
  • Comment on each of the Curiosity Crew blogs
  • Work from your own copy of Compendium of Curiosities III; don't reveal the technique in your write up; direct your readers to Tim's book, Compendium of Curiosities III instead
  • Don't use these challenges to promote your business or organization.  This is a celebration of Tim's book and techniques.


Follow the Guidelines - We Want You to Win!!

Can't wait to see all your beautiful art!!

Saturday, September 13, 2014

Effect Powders

Well, you guys continue to blow minds.   Seriously, CC3C #10 Assemblage Clocks may have been the best ever.  It is a JOY to view all the imaginative ways you come up with altering and tricking out these awesome clocks.  THANK you for continuing on this creative journey with us and challenging yourself more and more, time after time.  These are such good exercises, taking us creative places we might not otherwise have gone.  That's true for me, at least.  I'm learning more and more and loving taking this ride with all of you.

I've had this box I picked up at a garage sale which looked to me like it wanted to be altered.  This was the challenge to bring it out and give it its wish!
 I began by staining the box with Peeled Paint Distress Stain.  For some reason, the stain came off really bright, probably because of the color of the wood.  I used Vintage Photo and Walnut Stain Distress Paint to tone it down.  I just rubbed it on with my fingers.

I cut a stencil from a Plaid stencil blank with Tim's Tonic Craft Knife.  Very simple line of dashes to look like faux stitching.  Really big stitching.  ;-)  Wendy Vecchi Embossing Paste in black.  Love.  It.

I wanted to use that AWESOME new Wallflower Vellum so I applied some of the 6 x 6 sections to Sticky Back Canvas and die cut Tattered Flowers.  Then I stamped the backs of the flowers and painted them with Ranger Matte Medium to give them some body.  They REALLY curled up when I did that so I flipped them over and lay them on the craft sheet to set up.

Now for our featured technique, finally!!  I used Fabulous Flourishes and Caged Bird die cut grungeboard for my effect powders.  Check out this awesome technique on page 52 of Compendium of Curiosities III, which can magically appear in your mailbox when you click here.  Well, you'll have to do a couple of other things, too.


Oh my grungy goodness, I love this technique.  It really creates a worn, weathered texture.  Yummy!!  When I layered up my flowers, I got stumped on what to use for the center.  Stuck.  Really???  I can't make flowers?  I guess my creative brain just got tired, but I settled on Tim's Hitch Fasteners which were, for just a brief, frightening time, discontinued.  No more!!  Love it that he brought them back.
I added a couple of metal flowers by using effect powders on some mini bottle caps from Maya Road that I snipped with wire cutters and then flattened.  Distress Embossing Powder works beautifully on metal.

I wanted to give you an idea of the scale of this piece.  I really love how it turned out.  I didn't do anything to alter inside, except with color, because I want to use it for storage in my studio.  Not quite sure what will live in it yet.  I'll think of something.  ;-)
Well, there you are.  Ready to break out those Effect Powders?  I'm going to be SO excited to see all the beautiful things you create with this technique.  Remember, don't describe it in your write up, visit all the Curiosity Crew blogs and leave your comment.  Get all the guidelines for CC3C here.  We are all watching eagerly to see some of the best creative talent on the scene today go to work.  Seriously, y'all are awesome.

Inspiration Emporium reeeeeally wants you to win their $50 gift certificate this time!!  Tim and Mario have offered up an abundance of of signature Tim Holtz products which will be awarded to the Curiosity Crew choice.  You've got two ways to win.  You still reading this blog??  Go make art!