Birds & Words

Saturday, June 20, 2015

Layering Stencil: Paint Resist


Challenge #31.  Thirty one.  Three.  One.  That is a LOT of art!!

Great technique challenge this time that lends itself to all kinds of mixed media applications.  I thought I was going to do a card then thought I'd do a tag.  I ended up doing an art journal page using my tag.

Page 47 of Compendium of Curiosities III is where you'll find simple instructions for this technique.  Inspiration Emporium is our sponsor this challenge with an incredibly generous $50 gift certificate.  The Curiosity Crew choice wins an awesome cache of crafting gear from Sir Tim Holtz and his able assistant, Mario Rossi.  Check out all the guidelines you'll want to know about to be eligible for to win on Linda Ledbetter's blog.  Be SURE to leave some love on my Curiosity sisters blogs!!  

I used Scattered Straw and Bundled Sage Distress Paints with Typo, Wildflower, Numbering, and Gothic Layering Stencils.  Victorian Velvet and Wild Honey are my Distress Ink choices.  And Vintage Photo.  Always Vintage Photo.


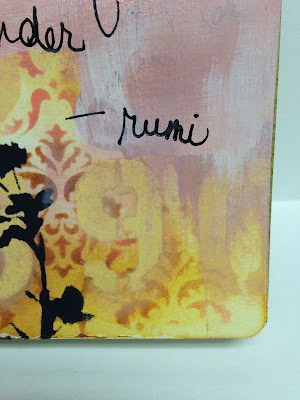
I was surprised and happy to find the Distress Paint resisted drips of Distress Spray Stain!!  I keep adding more and more touches of black, it looked great against the lighter, earthy colors.


I wrote my quote on an earlier version of right page and just blew it.  The stenciling made the background too busy and the writing got lost.  


This is the best, most funnest thing about art journaling to me.  You can gesso and paint over anything.  The mistakes often make the thing that you love the most, in the end.  I found this quote which I really loved.  I've been thinking about it for a while and really appreciated this chance to use of for an art journal page.  Dina Wakley's Fude Ball pens from Ranger are so great for art journaling, they write on anything!!  Very smooth and fluid.

I hope you have FUN with this tech!!  Go get painty!!

---------------

Soooooo......  how was your week?

Mine was a little crazy.  Actually the last two weeks.  On June 8 my husband went out for a sort hike in Rocky Mountain National Park, which is about 15 minutes from our house.  I got a call from him that afternoon that he had broken his ankle and needed help.  The short story is the Park Ranger Search and Rescue team (heroes!!!!) searched for him for six hours.  Once they found him, it took them over eight hours to get him back to the trailhead where I was waiting at 2 am to take him directly to the hospital.  Surgery that afternoon and then home by 7 pm.

It is still so surreal!!  If you're interested, you can read about it here.


I didn't really get to comment on your art for the last challenge and for that I apologize.  BUT my huz is doing really, really well and will be back on the trails this year, I'm sure.  I'm getting my schedule back and I'm really looking forward to more studio time!!

Saturday, June 6, 2015

Faux Cracked Glass

Greeting, artists!!  I have to say to all of you today that I am so enormously thankful and happy to be on this journey with you.  This is Challenge #30 (what????) and each one is more fulfilling than the last.  I can't believe I get to take this ride with all of you.

I want you to know I respect you so much, that I thoroughly enjoy reading your blogs and viewing your art.

I want you to know that ALL of you are:
Our challenge today is found on page 54 of Compendium of Curiosities Volume III.  What an amazing resource this book is!!  If you don't have your own copy, you'll need that to be eligible to win either:

the bounty of prizes, donated by Tim Holtz, for our Curiosity Crew winner
OR
a generous $25 gift certificate, sponsored by Funkie Junkie Boutique, for our randomly chosen winner.

Our Honorable Mention winners tell us it makes their day, too, to have their art recognized!
I used one of Tim's Corked Glass Vials for my featured Faux Cracked Glass piece.  The technique worked beautifully here.  I tapped (not rubbed, so as not to flake away the cracked pieces) the cracked medium with my blending tool loaded with Vintage Photo Distress Ink.  Then I gave it a light spritz of water to move the color into the cracked areas.  I blotted it with a cotton cloth to remove some of the color from the outside of the vial.
I used the burlap from Tim's Textured Surfaces to cover a tag.  I bound my cracked glass vial to the tag with waxed linen and put a few sprigs of dried yarrow from our yard into it.  There are a few paper sprigs from Tim's Spring Greenery Decorative Strip Die from Sizzix and cut from Retro Grunge Paper Stash Pad, as a little extra filler.
My stamp is a brand new one, Bird Trio, from B Line Designs.  Their new release, Vintage Spring, has some gorgeous images!  I cut this image up a bit and added a sprig of flowers at the bottom right corner.  I also stamped and cut out the middle and right birds to layer and pop them up.

I used the Faux Cracked Glass technique on a Fragments square.  I colored this one with Teakwood alcohol ink.  A bit darker but it made a nice layering piece.
I LOVE these Flip Frames.  LOVE, seriously.  I rubbed Weathered Wood Distress Paint on this one with my fingers and then buffed it a little with a cotton cloth before it was dry.  Effortless, truly.  I love the shabby chic effect.  But you don't have to paint them at all, they are gorgeous as is.
I measured my hanging piece at 3 1/4 x 5 1/4.  It would have been SO smart to hang it in the frame before I did all my work on it, which I didn't!!  If I had, I would have trimmed it just a bit more at the bottom.  But it works just the same.

Grab your CC3 and go for it!  Check out Linda Ledbetter's blog for all you need to know about how to join in and don't forget to leave some love for the Curiosity Crew who, no doubt, are even now feverishly creating!


Happy creating and we'll be watching!!