Birds & Words

Saturday, December 6, 2014

Woodlands & Tinsel Twine

'Tis the season!!  This has snuck up on me, anyone else feel that way?  All of a sudden is Christmastime and next its 2015 and whaaa?? How did this happen??

Our family is doing Christmas very simply this year and that feels very good to me.  Several of us do handmade Christmas and a Simple Christmas makes more time for that.  I've always considered the gift wrapping of gifts under the tree as part of our Christmas decoration.  Simple Christmas makes it possible to create really unique, artful and personal packaging for the simple offerings for friends & family.
The Woodlands & Tinsel Twine challenge is found on page 60 of Tim's book.  I created a tag for this challenge.  I used a vintage photo from Tim's Merriment Paper Stash of a Christmas parade.  This float features Santa and a whole bunch of children, but only one is looking at the camera.  This little girl was the most interesting face to me and I wanted to feature her, even above Santa!!
I used Adirondack Pearl Paint Dabber on the photo on all the areas I wanted to fade or recede, so as to highlight my little girl.  I just dabbed on some paint and then rubbed it with my finger.  I used Stabilo All Pencil around the little girls head and then blended that out with water to create a shadow around her and bring her forward.
I sprayed the Woodlands tree with Iced Spruce and Peeled Paint Distress Spray Stain.  Are you IN LOVE with these sprays??  I want to drink them, which might make me sick, but also might infuse me with limitless creativity.  Mmmmmm.....  what to choose??
A couple of details:   I used some dots of Liquid Pearls on my trim to create faux pearls.  I love little touches like this that create tiny interest, but add to the piece overall.   This stuff is sort of slow to dry, but worth it.
This was an idea that I had that almost worked.    Liquid Pearls is a dimensional pearlescent paint.  I thought if it was dimensional, I could use it to pop out tiny cut out elements.  I should have let it dry a little first, tho.  These little cut out words flattened out the paint.  Next time, I'll let it dry a little and then lay down the  embellishment on top.
I was at a Whole Foods in the bulk bins (LOVE those bins) and saw these little paper bags.  The guy said I could have a couple of extra bags (do you LOVE people who give you paper??) so I used one to attach my tag.  That's the pretty packaging that will wait under the tree until Christmas morning.

This challenge is sponsored by Inspiration Emporium.  Seriously, these guys are so generous with their bi-weekly $50 gift certificate for a random CC3C winner.  You should give them some love by doing a little shopping when you need some CC3C stash.  Why not?  'Tis the season.

The Curiosity Crew choice will receive this amazing prize pack donated by Tim Holtz Hizzelf, how cool is that??
Any questions about how to be eligible for these awesome prizes?  Check out Lovely Lady Linda Ledbetter's blog for all the deets.  Kneed knowledge of Tim's techniques or products to create with for challenges?  Check here to get your very own Tim-signed copy of Compendium of Curiosities III.  And last, but not least, be sure and leave a comment on all Curiosity Crew blogs to maintain your eligibility to win a CC3C prize for the AWESOME art you'll be entering.  We can't wait to see it!  Go for it!  YOU are an artist!

Saturday, November 22, 2014

Layering Stencils: Embossing

It is AwEsOmE that we've got a new challenge today because you guys just exploded the Cabinet Card challenge and any more creativity is dangerous!!  Seriously, the Curiosity Crew has a serious job to do and it's not going to be easy.

Our challenge this week uses Tim's Layered Stencils.  The technique can be found on page 50 of Compendium of Curiosities.  Click here to get your own copy if you don't already have it.  We don't describe the techniques on CC3C blogs, but I will say this:  you don't need very much to enter this challenge.  You very well could have all the Tim gear you need right now for this one.  You can go to work today!!


I used strips from a Christmas music page out of Tim's 8 x 8  Seasonal Collage Paper Stash as a layered background.    I love the subtle details of words to familiar Christmas carols.  The snowflakes are a Cherry Lynn die.  I used a mix of white ones and not so white ones cut from a Halloween page out of the Seasonal Collage Paper Stash pad.


I love this sweet little deer.  She (yes, she's a girl) is embossed with Distress Embossing Powder in Tea Dye.  I cut a strip of Grungeboard with the Ornate On the Edge die and covered it with Wendy Vecchi Embossing Paste.  Once dry I tapped a little Ranger Multi Medium on the paste and then sprinkled a pinch of Antique Linen Distress Glitter over it.  Stamped Tall Trees are embossed with Peeled Paint Distress Embossing Powder, one topped with a Maya Road trinket pin star snipped away from the pin.

I dabbed some Antique Brass Distress Paint on seam binding and crumpled it.  I love the texture it gives.

More Antique Brass Distress Paint and Antique Linen Distress Glitter combine for a framed "25".  I snipped out an oval backing from my well loved paper stash pad!  I always make my gift tags for gifts under our tree, as I'm sure many of you do.  This challenge was a perfect kick start to get that done.


Our sponsor for our lucky winner this time is Funkie Junkie Boutique, with an awesome $25 gift certificate.  Very cool opportunity to grow your stash for future challenges!!  Tim and Mario are also sponsors for the Curiosity Crew choice with a fabulous prize package.  Check out Linda's blog here to see a pic of the items you could win!  You'll also find the guidelines for challenges here.  Be sure and visit all host blogs and leave a comment so you'll be eligible for all the above.  What a kick to play along!!

"Inspiration exists, but it has to find you working."  Pablo Picasso  Amen to that!!

Saturday, November 8, 2014

Cabinet Cards

What a COOL embellishment!!  I am all about frames this year and these cards give you a lot of possibilities.  I can't wait to see what y'all do with these for this challenge #15.  I'm back in Texas visiting my family and had to prepare this one early so I did a fairly simple project this time, but I've continued to have ideas, so I'll be doing more with these soon.  But there's a story that goes with this one.....


My husband, Rick, has been a St. Louis Cardinal fan since he was a little boy.  He remembers an October when he was in 7th grade, walking to get his lunch in Lawton, Oklahoma, listening to the World Series on a transistor radio.  The Cards won that series in 1967 and Red Schoendienst was the manager of the team.  Red had had his own successful career playing in the major league for the Cards, the Braves, the Giants, and then back to the Cards to finish in 1963.  He was inducted into the baseball Hall of Fame in 1989 and the Cards retired his number "2" in 1996.  Kind of a big deal.

Rick was recently gifted with a baseball which Red Schoensdienst signed, just for him.  It was an incredibly thoughtful gift and couldn't have been given to a more appreciative fan.  I saw that little boy in Rick's eyes as he told me about it.
This is the thank you card I made for Rick to send.  The picture of of Red's 1965 Topps baseball card is slipped into a cabinet card and I added a few embellishments to enhance the cardinals theme.  Tim's embellishments made this SO easy.  The Stencil Mark Metal Clips "2" was just the thing, Vellum Ephemera, Pen Nibs (LOVE those - I can't find a project these don't work on), an "authentic" Word Band and "one of a kind" Remnant Rub.   I layered the cabinet card onto a folded note card.

You've got to get into this challenge!!  The package of Cabinet Cards Frames contains 5 vintage frames and are printed on front & back.  They hold a 4x6 insert and my mind is buzzing with some things I want to put in my next one!!

Our sponsors for this challenge are Inspiration Emporium with a $50 gift certificate and Tim Holtz with a grungy prize package that will make you swoon.
  • Find all the details and challenge rules on Linda Ledbetter's here.
  • You'll need to work from your own copy of Compendium of Curiosities III, so get your copy of Tim's book here.
  • Check out all the challenge hostesses blog's here.  This is important because you must leave a comment on all hostess blog to be eligible to win.  And we want YOU to win!!
Happy creating!!

Saturday, October 25, 2014

Colored Crackle

A new technique challenge!!  Don't you love those?  Include this fabulous technique on whatever your creative heart desires.  It's found on page 53 of Compendium of Curiosities III.  Click here to get your own copy signed by T!m Holtz himself or pick one up at your local craft shop.

Sometimes when "the sky's the limit" it makes creating easier, sometimes not.  This project began for me in one place and ended up in quite another.  But that's very cool that I can be okay with my scattered self and follow my imagination wherever it leads me.  This time it led me someplace quite familiar....  Flying Things.  I'm a bird lover.  I think I'm more enamored with the idea of birds rather than those little things flying around outside.  I spend much more time with pictures and symbols than I do the actual creatures.  I'll be changing that, I think.

When I started out I knew I wanted to do a few things for sure.  I would use the Colored Crackle technique on die cut Grungeboard, use an exposed Ring Binder, and include a found turquoise charm.  My initial idea for the Ring Binder didn't work out, so I used a structure learned from Wendy Vecchi (from her Inspiration Station she taught at our store a couple of years ago).
I am having a BLAST with the new Distress Spray Stains.  I can't wait till all colors are available.  I was working from my home studio and didn't have the right color Distress ink pad, so I just sprayed stain onto my blending tool and used it with Tim's Harlequin stencil.  Worked beautifully.  I picked up some overspray on my craft sheet with a dry brush to color my bird (stamped on a scrap of white denim and cut out) on the cover of my piece.  This is powerful stuff, my friends.
On the back side of the cover piece of Grungeboard I used the Paint Marbling technique from our very first CC3Challenge!  I carefully applied the paint so that it looked like a map of the United States and Europe.  NOT!!  Crazy the pictures you can see in this marbled effect!!

Some of the inside pages:
 The butterfly is cut from Tim's tissue wrap.  I cut and tore a lot of stuff from tissue and stamped tissue.  The body of the butterfly is a vintage rusty nail.

 Same page with the Memory Glass charm pushed aside.
All inside pages are cut from various materials using the Ornamental Bigz die.  This one is cut from Sticky Back Canvas adhered to cardstock.  This is a work in progress.  I'll probably add some more flying things to this art journal.  The stamps reminded me of airmail, the birds, butterflies and bugs are more obvious flying things.  What else is a flying thing?  Our imagination? Can our hearts take flight? Does music make our hearts soar?

I really hope you'll jump right in for this challenge!!  Funkie Junkie is our sponsor for this challenge with a generous $25 gift certificate going to a random winner.  Tim and Mario are sponsors for every challenge with a generous prize package going to the Curiosity Crew pick.  YOU can win!!  We can't wait to see what you do with this one!

Find all the details you need to know for entering and winning on Linda Ledbetter's blog.  Be sure make your comments on all the Curiosity Crew blogs, work from your own copy of Compendium of Curiosity, no sharing of the technique on your write up, and include links for the current sponsor (Funkie Junkie this week) and to CC3C.

A note on how we choose our winners:  Our goals for these challenges are 
  • for you to be challenged to create your best art
  • for everyone to feel encouraged and supported
  • for people who are newer to entering challenges to feel that they have a chance to be recognized and to win challenges
  • to reward outstanding creativity
  • to reward those who do their very best no matter what level they may be on in their artistic journey
  • to celebrate Tim Holtz's techniques, signature products and books, AND
  • to enjoy each other's artistic company.  
Please know that we have so many wonderful entrants, sometimes its almost impossible to choose.  Keep creating!  Keep entering the challenges!  We are SO proud of all of you.

Saturday, October 11, 2014

Worn Cover CC3C #13

Another fortnight, another challenge.  (I'm infatuated by all things British.)  I want to begin this one by a heartfelt thank you for all the kind things you guys say on my blog.  You humble me and encourage me.  I feel so honored to be on this creative journey with all of you.  YOUR talent amazes and inspires me.  Wish we could have CC3C party!!

Well, let's just have our CC3C party here online!  This challenge is a set-your-Tim-Holtz-self-free project!  Use Tim's Worn Cover binder and go crazy.  Embellishment it, alter it, paint it, ink it, spray it, just go for it!  Page 35 of Compendium of Curiosities III will give you some starting pointers, and I'll share things I've learned doing my project, too.  Remember to get your own copy of Tim's book to work from.  I think he should have called it World Crafting Encyclopedia.  Fabulous source to go back to over & over.
I loved the idea of a place to collect all those tags we make.  In keeping with that idea, I altered the cover of my "Worn Cover".  I started by spraying the whole thing over with Tim's new Distress Spray Stain in Antique Linen.  LOVE  LOVE  LOVE!!!!  Yip yip yippee!!  I was THRILLED when I first learned about these and ordered them about 10 seconds (maybe 8?) after I knew they existed.  Only 24 colors so far, but experience and my optimistic personality tell me the others will soon follow.  (I NEED Stormy Sky.  Need, truly need.)

I stamped and sprayed a piece of Sticky Back Canvas with Distress Spray Stain in Antique Linen.  I wanted to use Hitch Fasteners to affix the inner binder rings.  This is not my idea, but I don't know where I saw it, so I'm sorry I can't give credit.  The stem on the Hitch Fastener is not very long so I had to remove the eyelets that are prepared on the spine of the Worn Cover.  Then I was able to screw the things together.
 The cover features a frame cut from Grungeboard and then sprayed with Distress Spray Stain in Broken China.  I added some stamping and then popped it out with strips cut from Grungeboard scraps.  The front is embellished with a Layered Bee cut from Sticky Back Canvas and embossed.  The embossing on this was a little tricky because those bee legs don't want to stay where they're supposed to in the embossing folder.  Just tape them down.
The bee is sprayed with Iced Spruce Distress Spray Stain and then I sprayed just the wings with Perfect Pearls Mist.

The tag slides in and out of the frame.  I love Dina Wakley's new stamp set and this stamp especially. I decided I stamp this on everything I work on now because that little stamp kept prompting me to carry on.  Stay brave, girl!!


A few charms, a little embossing paste and its done.  I hope you guys have as much fun with this as I did.  I am a notebook hoarder.  I've got several I've made with nothing in them!!  I just like them.  I'll add this to my collection, but will fill it with tags for sure.  Be sure and visit the CC3C website on Linda Ledbetter's blog so you fill all the Ts and Cs for this challenge.  (Anyone know what Ts & Cs are??)  :-)  Inspiration Emporium is our generous sponsor for the challenge for a lucky random winner and Tim and Mario's crazy donation will be awarded for the Curiosity Crew Choice.  Be sure to leave your comment on all host blogs.  Doncha wanna win?  I know you do.   Remember, just....

Saturday, September 27, 2014

Distress Photo Tinting

Meet Mollie.  Well, her name is Mary Margaret Brooks, but all her friends call her Mollie.  She was born in 1870 and saw the world change during her lifetime.  She grew up with her mother and 5 sisters in rural east Texas, and grew up without her father who never came back from the Civil War.  She was the baby of the family.

She worked hard all her life, loved her friends and family stubbornly, and laughed loudly.  She could tell a joke better than anyone but that didn't stop her from wanting to hear everyone else's funny stories.  At 94 she still had a mischievous sparkle in her eye.

She died just a few years after this photo was taken.  Strong to the end, she left this life suddenly.  But that's how she would have wanted it.  Strong to the end.
And.....  that whole story is made up.  This photograph came to me a few years ago from a friend who gave me a whole collection of vintage photos.  (Maybe that's why that's my favorite Distress color!!)  I've always been fascinated by this old girl.  I knew this is the picture I'd want to use for this challenge and my respect for "Mollie" has only grown as I've worked with her beautiful face.
This is a FABULOUS technique.  You can add such interest and life to these pictures.  Here's a before & after.  Amazing.  I promise you, I'll be doing this one again and again.  SO much fun. Learn this technique from page 41 of Compendium of Curiosities III.  
Note:
1.  I had best success taking my photograph to a copy store and having them print the photos on glossy paper.
2.  Using a tip from the talented Lady Ledbetter, I picked up just a pin dot of water with my color source and then tinted the photo.  That's all I'll say so as to not reveal Tim's technique, but this made all the difference in a good result for me.
 I used Tim's NEW Alphanumeric die set which is a "GOT-to-have-it".  I laid out the letters and then placed a piece of tape over the line of dies.  I picked them up and laid onto the tag,  cutting out the lettering and used the negative spaces on my tag for interest.
The wording came from the back of the photograph.  No name, sadly.
I used Tim's Remnant Rubs on Enamel Tags to create my messaging.  It made me think about myself and how much time and energy I give to coloring my hair, trying to keep fit, moisturizing my aging skin.  How relatively little time I give attending to timeless beauty.  Thank you, Mollie.  You've reminded me and encouraged me to be more deliberate to develop inner qualities of the soul.
I smile to think of the fun you'll have with this delicious technique!  Enter your art and gain a chance to win a Funkie Junkie gift certificate or a treasure trove of goodies from Tim Holtz!   Best thing to do is go to Linda Ledbetter's blog and get the game plan for entering and being eligible to win.  If you enter, it would be a SHAME not to be eligible to win, no?  Do this:
  • Include a link to CC3C
  • Include a link to the current sponsor, which is Funkie Junkie for this challenge
  • Comment on each of the Curiosity Crew blogs
  • Work from your own copy of Compendium of Curiosities III; don't reveal the technique in your write up; direct your readers to Tim's book, Compendium of Curiosities III instead
  • Don't use these challenges to promote your business or organization.  This is a celebration of Tim's book and techniques.


Follow the Guidelines - We Want You to Win!!

Can't wait to see all your beautiful art!!

Saturday, September 13, 2014

Effect Powders

Well, you guys continue to blow minds.   Seriously, CC3C #10 Assemblage Clocks may have been the best ever.  It is a JOY to view all the imaginative ways you come up with altering and tricking out these awesome clocks.  THANK you for continuing on this creative journey with us and challenging yourself more and more, time after time.  These are such good exercises, taking us creative places we might not otherwise have gone.  That's true for me, at least.  I'm learning more and more and loving taking this ride with all of you.

I've had this box I picked up at a garage sale which looked to me like it wanted to be altered.  This was the challenge to bring it out and give it its wish!
 I began by staining the box with Peeled Paint Distress Stain.  For some reason, the stain came off really bright, probably because of the color of the wood.  I used Vintage Photo and Walnut Stain Distress Paint to tone it down.  I just rubbed it on with my fingers.

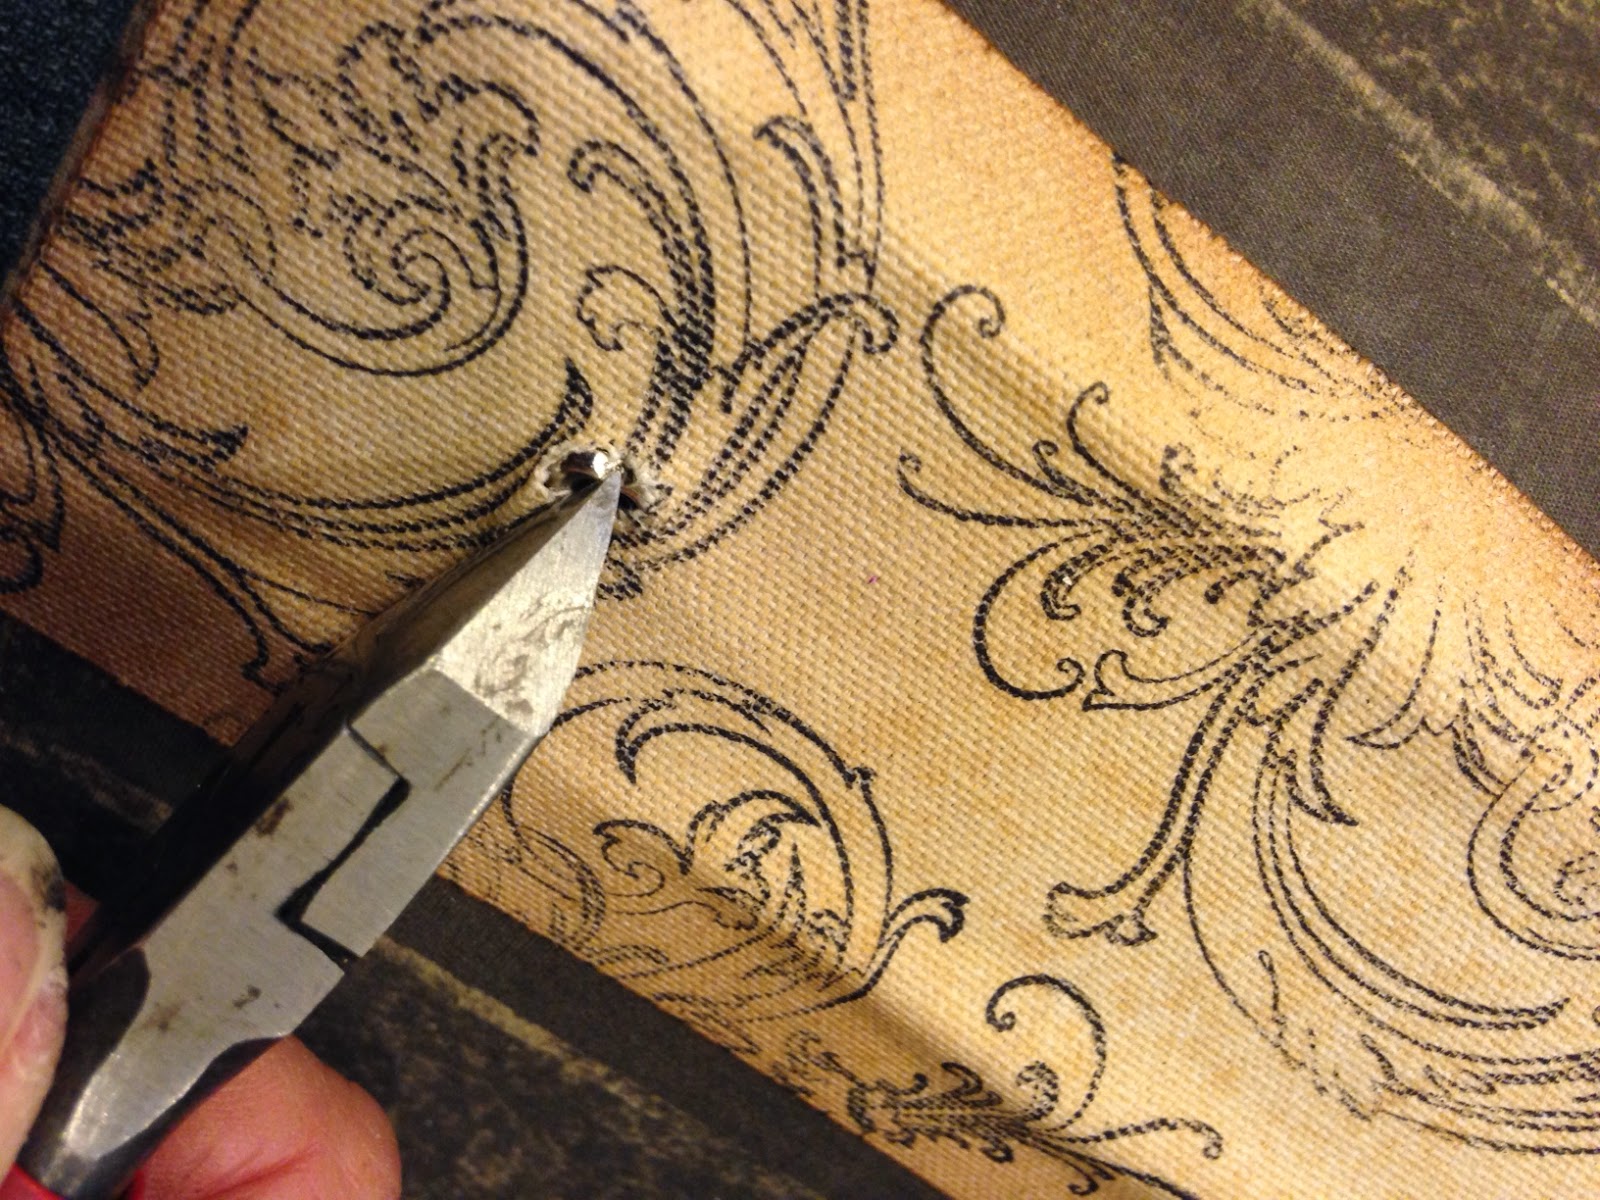
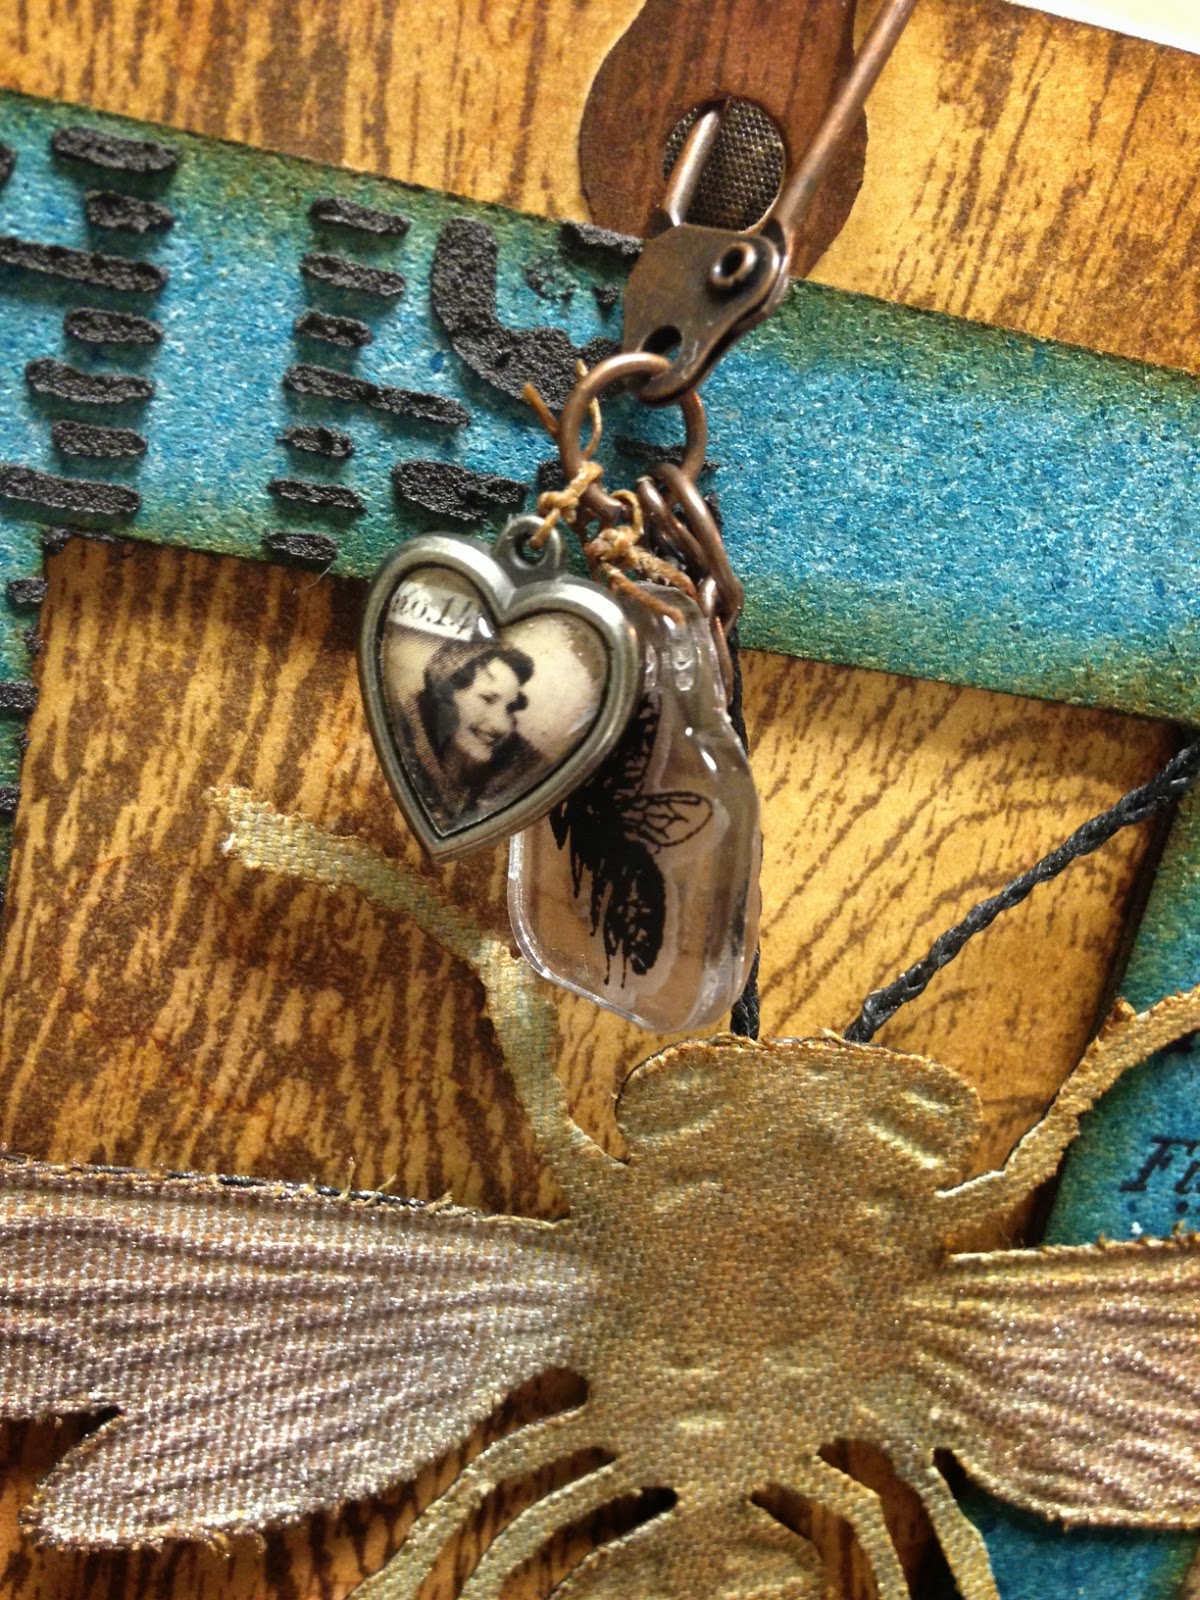
I cut a stencil from a Plaid stencil blank with Tim's Tonic Craft Knife.  Very simple line of dashes to look like faux stitching.  Really big stitching.  ;-)  Wendy Vecchi Embossing Paste in black.  Love.  It.

I wanted to use that AWESOME new Wallflower Vellum so I applied some of the 6 x 6 sections to Sticky Back Canvas and die cut Tattered Flowers.  Then I stamped the backs of the flowers and painted them with Ranger Matte Medium to give them some body.  They REALLY curled up when I did that so I flipped them over and lay them on the craft sheet to set up.

Now for our featured technique, finally!!  I used Fabulous Flourishes and Caged Bird die cut grungeboard for my effect powders.  Check out this awesome technique on page 52 of Compendium of Curiosities III, which can magically appear in your mailbox when you click here.  Well, you'll have to do a couple of other things, too.


Oh my grungy goodness, I love this technique.  It really creates a worn, weathered texture.  Yummy!!  When I layered up my flowers, I got stumped on what to use for the center.  Stuck.  Really???  I can't make flowers?  I guess my creative brain just got tired, but I settled on Tim's Hitch Fasteners which were, for just a brief, frightening time, discontinued.  No more!!  Love it that he brought them back.
I added a couple of metal flowers by using effect powders on some mini bottle caps from Maya Road that I snipped with wire cutters and then flattened.  Distress Embossing Powder works beautifully on metal.

I wanted to give you an idea of the scale of this piece.  I really love how it turned out.  I didn't do anything to alter inside, except with color, because I want to use it for storage in my studio.  Not quite sure what will live in it yet.  I'll think of something.  ;-)
Well, there you are.  Ready to break out those Effect Powders?  I'm going to be SO excited to see all the beautiful things you create with this technique.  Remember, don't describe it in your write up, visit all the Curiosity Crew blogs and leave your comment.  Get all the guidelines for CC3C here.  We are all watching eagerly to see some of the best creative talent on the scene today go to work.  Seriously, y'all are awesome.

Inspiration Emporium reeeeeally wants you to win their $50 gift certificate this time!!  Tim and Mario have offered up an abundance of of signature Tim Holtz products which will be awarded to the Curiosity Crew choice.  You've got two ways to win.  You still reading this blog??  Go make art!