Another fortnight, another challenge. (I'm infatuated by all things British.) I want to begin this one by a heartfelt thank you for all the kind things you guys say on my blog. You humble me and encourage me. I feel so honored to be on this creative journey with all of you. YOUR talent amazes and inspires me. Wish we could have CC3C party!!
Well, let's just have our CC3C party here online! This challenge is a set-your-Tim-Holtz-self-free project! Use Tim's Worn Cover binder and go crazy. Embellishment it, alter it, paint it, ink it, spray it, just go for it! Page 35 of Compendium of Curiosities III will give you some starting pointers, and I'll share things I've learned doing my project, too. Remember to get your own copy of Tim's book to work from. I think he should have called it World Crafting Encyclopedia. Fabulous source to go back to over & over.
I loved the idea of a place to collect all those tags we make. In keeping with that idea, I altered the cover of my "Worn Cover". I started by spraying the whole thing over with Tim's new Distress Spray Stain in Antique Linen. LOVE LOVE LOVE!!!! Yip yip yippee!! I was THRILLED when I first learned about these and ordered them about 10 seconds (maybe 8?) after I knew they existed. Only 24 colors so far, but experience and my optimistic personality tell me the others will soon follow. (I NEED Stormy Sky. Need, truly need.)
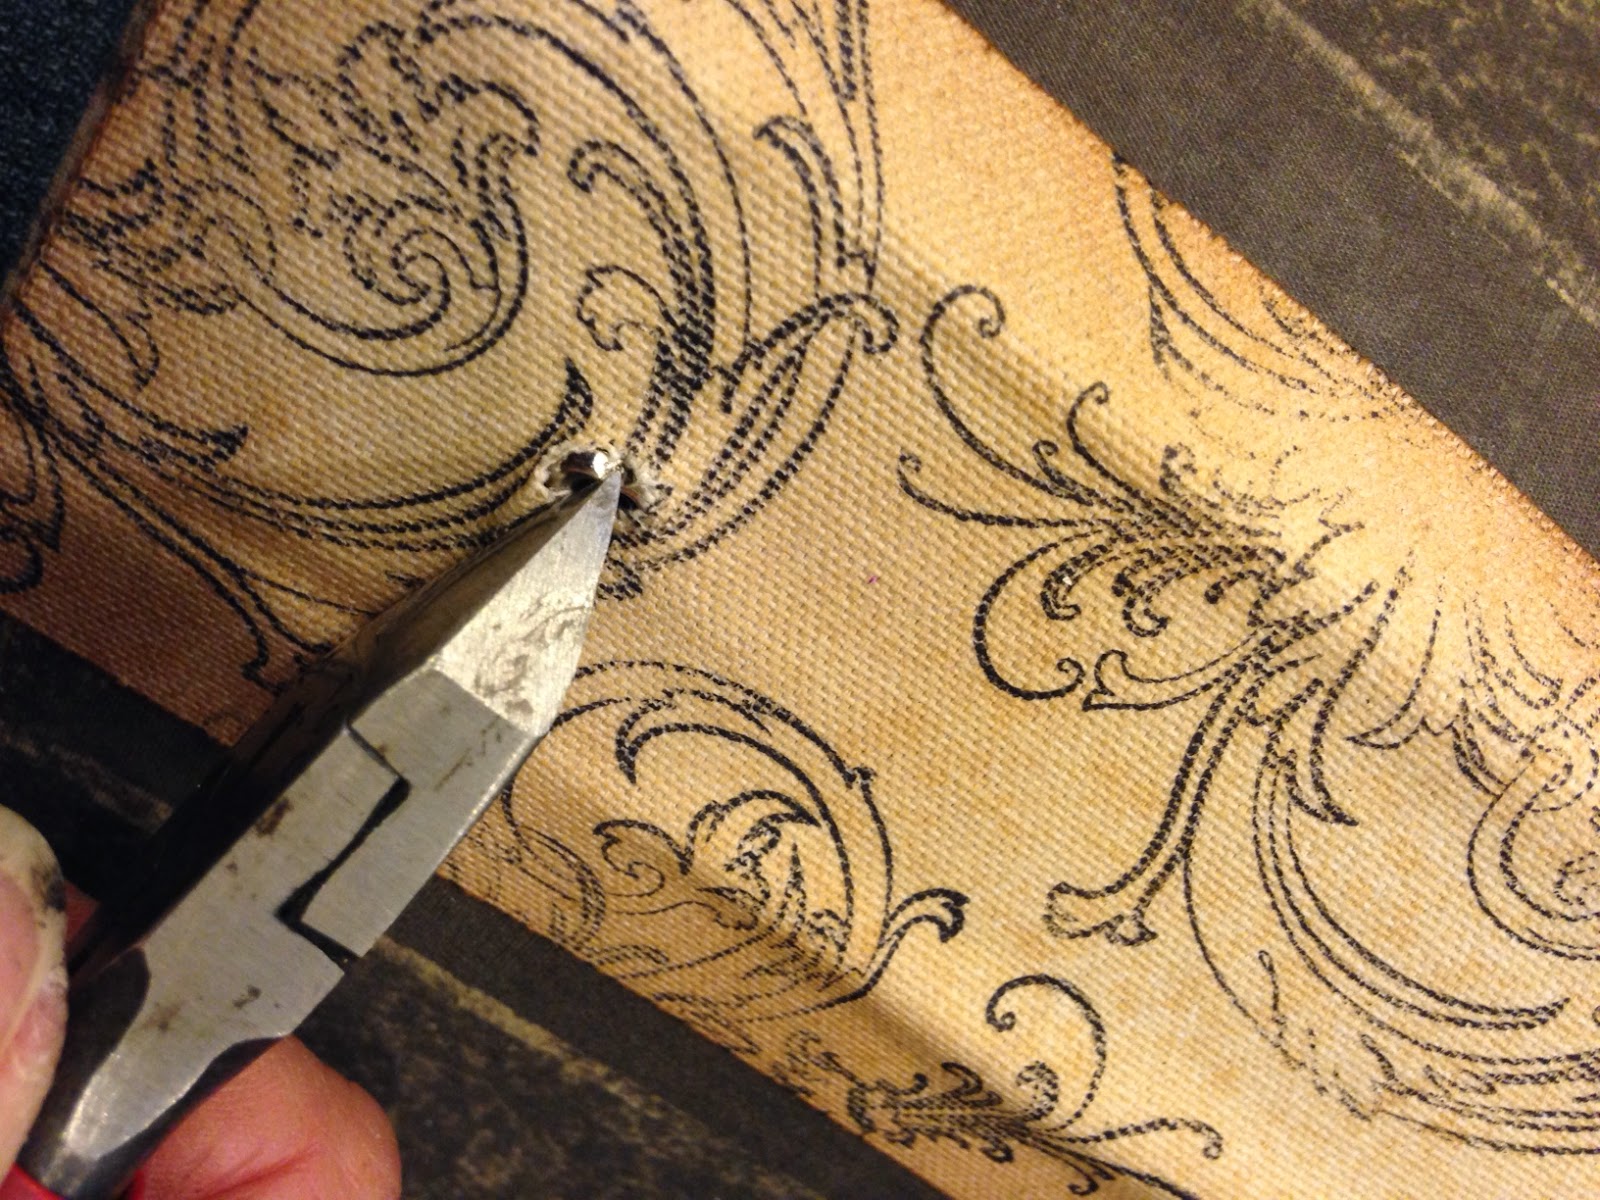
I stamped and sprayed a piece of Sticky Back Canvas with Distress Spray Stain in Antique Linen. I wanted to use Hitch Fasteners to affix the inner binder rings. This is not my idea, but I don't know where I saw it, so I'm sorry I can't give credit. The stem on the Hitch Fastener is not very long so I had to remove the eyelets that are prepared on the spine of the Worn Cover. Then I was able to screw the things together.
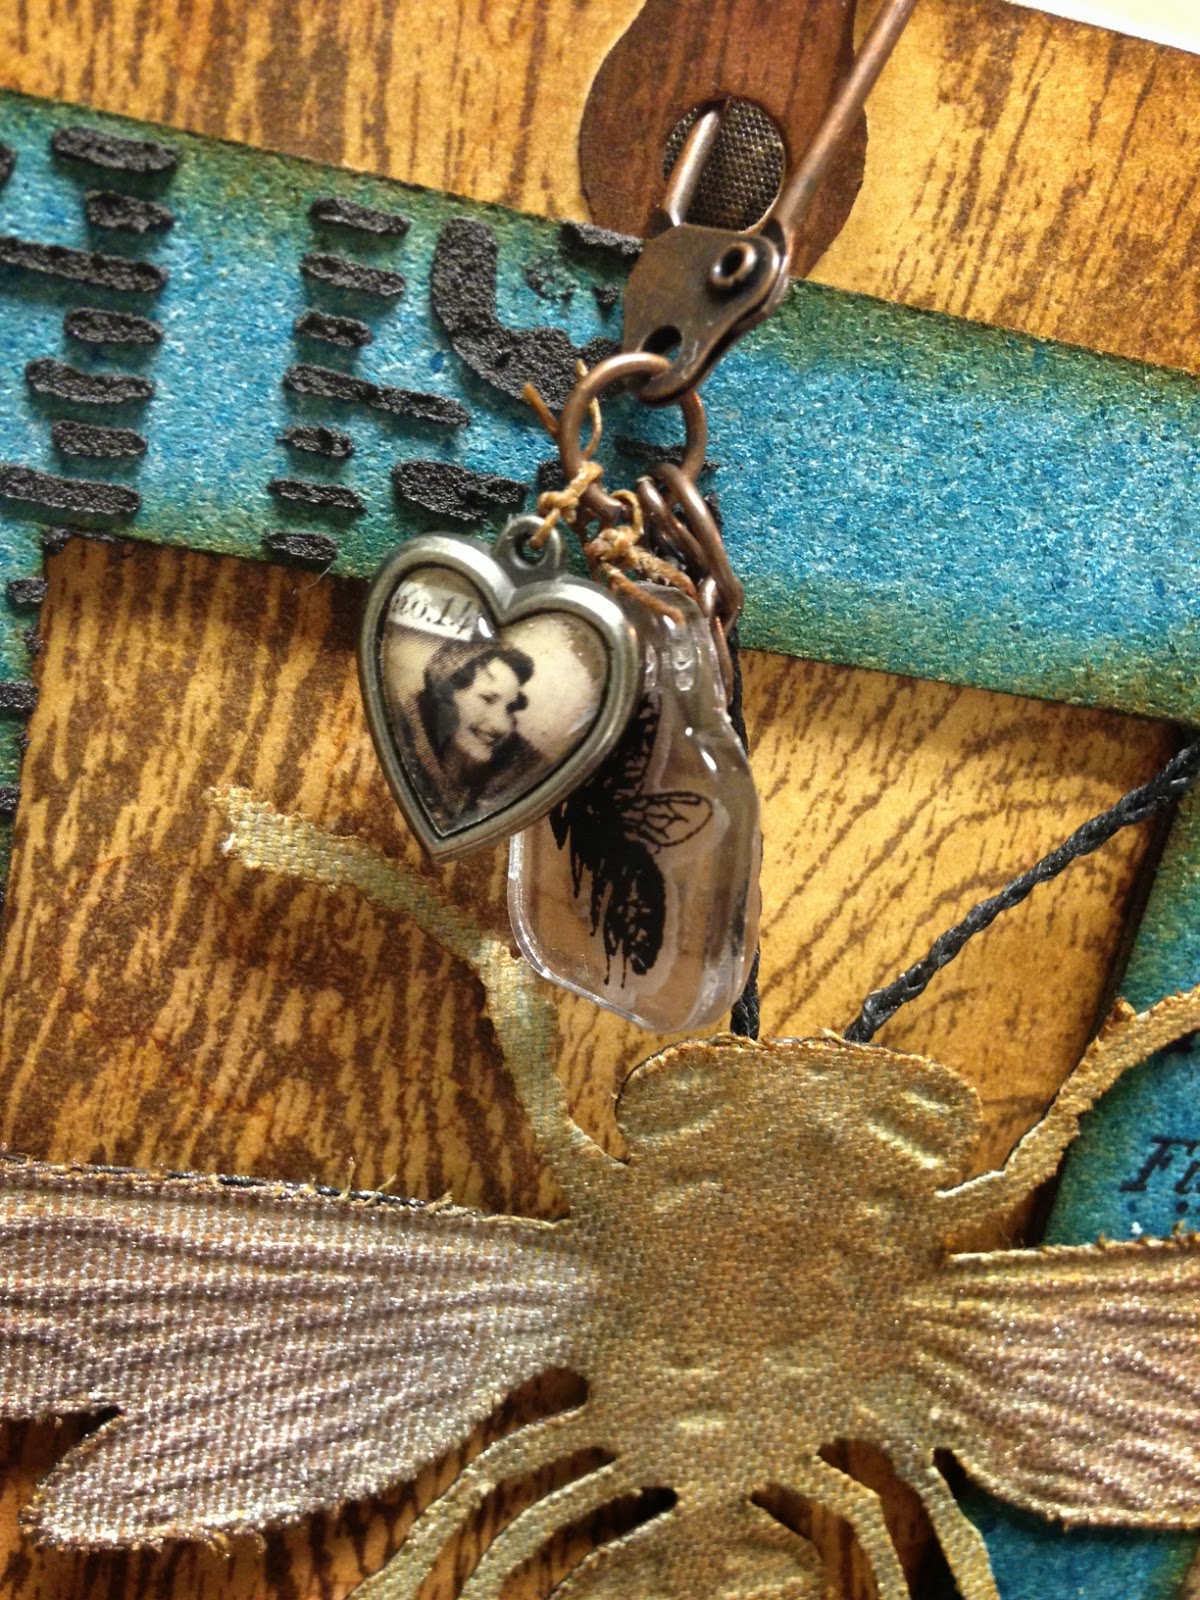
The cover features a frame cut from Grungeboard and then sprayed with Distress Spray Stain in Broken China. I added some stamping and then popped it out with strips cut from Grungeboard scraps. The front is embellished with a Layered Bee cut from Sticky Back Canvas and embossed. The embossing on this was a little tricky because those bee legs don't want to stay where they're supposed to in the embossing folder. Just tape them down.
The bee is sprayed with Iced Spruce Distress Spray Stain and then I sprayed just the wings with Perfect Pearls Mist.
The tag slides in and out of the frame. I love Dina Wakley's new stamp set and this stamp especially. I decided I stamp this on everything I work on now because that little stamp kept prompting me to carry on. Stay brave, girl!!
A few charms, a little embossing paste and its done. I hope you guys have as much fun with this as I did. I am a notebook hoarder. I've got several I've made with nothing in them!! I just like them. I'll add this to my collection, but will fill it with tags for sure. Be sure and visit the CC3C website on Linda Ledbetter's blog so you fill all the Ts and Cs for this challenge. (Anyone know what Ts & Cs are??) :-) Inspiration Emporium is our generous sponsor for the challenge for a lucky random winner and Tim and Mario's crazy donation will be awarded for the Curiosity Crew Choice. Be sure to leave your comment on all host blogs. Doncha wanna win? I know you do. Remember, just....
December Memories 2025 FREE tutorial
2 months ago


Love your worn journal cover that will house your tags! I especially like the way you've created a tag for the front of the cover - awesome! And that bee...it's the bees knees!
ReplyDeleteFYI...your link leads to last time's project.
ReplyDeleteLOVE the pocket to house a tag! Brilliant idea!!! And I too, could use a place to house all those tags I have laying around waiting to be completed. LOVE the bee as well!
Thanks, Anita. I know it does, but I think Linda has to fix it. Sorry for the confusion!
ReplyDeleteHey girly...love that you have created this to hold your tags! so clever...I need to do that because they are just everywhere! drives me nuts, wink. You're worn cover alteration is fabulous! You have that nature theme pegged! Love the Bee...it's the icing on the cake! wink wink. big hugs!
ReplyDeleteSTICKY BACK CANVAS BEE OMG... it looks great I thought it was a medal ! Such fun details... great tips too for hitch fastner. Oh I so lover the stamp Stay Brave ... so fits my CC3 Challenge Journey !
ReplyDeleteFabulous! I love your bee.
ReplyDeleteAnd I can't wait for Festive Berries, hope it comes out before Christmas!! I love the bee and the frame looks amazing. That is a great tip about the fasteners, will try to remember that one. Great party too! Anne x
ReplyDeleteGlad your up and running certainly wanted to leave a comment here. Your worn cover is beautifully done Cheryl. Great idea to place a pocket for tag on front. Your bee looks fabulous too. Karen.x
ReplyDeleteThank you so much, Karen. I appreciate you coming back and making such a nice comment!
DeleteLove your great idea using a pocket.
ReplyDeleteCheryl, great job. I would to have such a journal... Very cute
ReplyDeleteFun journal to hold your tags. The touches with the sticky back canvas add a wonderful texture. The frame to hold the wood grain tag rocks! Thanks for the inspiration.
ReplyDeleteWhen I did Tim's Chemistry 102 he suggested using binders for the project tags so I bought 2 of them. Never thought to alter them so here goes!! thanks for the kick. LOL
ReplyDeleteI love the tag on the front. The woodgrain is great. Such a pretty cover. The colors are wonderful.
ReplyDeleteJess
Embossed Sticky Back Canvas?? Now that's genius! I love this bee-utiful worn cover, Cheryl, and I love the idea of using the hitch fasteners at the spines.
ReplyDeleteFabulous Worn Cover, Cheryl. I love your use of the sticky back canvas as your binder edge-love sticky back canvas :) All of your stamping and stenciling and die cuts are wonderful elements for your tag portfolio!! XOXO-Shari T.
ReplyDeleteCheryl love all the layers to your front cover from the framing to housing the tag! Love how the tag blends as part of the backgound. Fun stuff.
ReplyDeleteThanks for sharing.
I love the hitchfastners .. what an awesome idea for tags .. I might have to do my own version of that ! Love the cover !!!
ReplyDeleteSO clever! That bug! Yikes! It's so realistic!
ReplyDeleteCheryl...your worn covers book is awesome! I LOVE the sticky back canvas that you used on the spine. Neat look! Love the layered bee! I have GOT to use that guy! I have him...he's still in the package....says the hoarder. haha Your cover is really pretty. Love the colors you've used. That antique linen spray really gives such a vintage look to your cover. Love the blue frame and your woodgrain tag that can be removed. What a great place to store and display your lovely tags! <3 Candy
ReplyDeleteI have managed to get my paws on the dragonfly...there is still a bee in my local store...now you are tempting me...I love the sticky backed canvas you have used and with my fave stamp too...it was the first of Tims stamps in my collection. It is seriously my "go to" stamp for every occasion. I think I might use a handle to put my workings together...Saw that on a fabric sample book and thought it might work on this book...need to go shopping with my book to get the right size handle.
ReplyDeleteHow cool! Love the idea of making the one tag removable on top. Super texture on your frame, too. Love it!
ReplyDeleteI love the frame with the wood pattern taq...such a nice offset! And using the sticky backed canvas...Brilliant! Thanks for the tip.
ReplyDeleteOh I love that big beautiful bee and how clever to add a secret hiding spot for the tag. Love the design and all the details on your vintage worn cover!
ReplyDeleteOh, that hitch fastener idea is great! I may have to steal that. Love your bee and that's a great phrase stamp. I think I need some of those sprays, too. You Curiosity gals make me want it all! Thanks for sharing the process to create this beautiful piece.
ReplyDeleteThis is all put together so well. The bee looks amazing. A real center piece.
ReplyDeleteAmazingly created - that pocket on the front is sheer brilliance Cheryl
ReplyDeleteThat removeable tag on the cover is inspired! And i love the color!
ReplyDeleteVery cool, I love the texture of your bee! Great idea to house your tags!
ReplyDeleteBeautiful cover and it's such a great way to hold your tags - love it!
ReplyDeleteWowwww, great job, I love it!!!!!!
ReplyDeleteHugs,
Ellen
I adore that bee - its absolutely brilliant - must add that one t the wish list. And that tag background is fabulous - brilliant worn cover -love it xx
ReplyDeleteGotta have a special place for our labor-of-love tags. Love that you have a removable tag on the cover. Beautiful work.
ReplyDeleteLove your book! Thanks for the hitch fastener tip! Love the be, and the reminder to be brave! Love the tag pocket frame on the front. Love the wood print too. It's such a lovely cover! I never thought to emboss canvas. Where have i been?
ReplyDeleteThis is great with the giant bee. Harvest time here, so like. The garden theme.
ReplyDeleteWow embossed sticky backed canvas, I've got to try that. Love this cover, a very good motto too, stay brave,
ReplyDeleteLove the dimension you have created on your cover. It's great the way you can slip a tag in the frame ! X
ReplyDeleteWhat an insanely creative idea. I adore the frame that allows you to highlight different favorite tags. Soooooo cool. The hitch fasteners are the perfect accents on the spine and I love the bee. So many fabulous ideas here Cheryl. Thanks for the inspiration. -- Mary Elizabeth
ReplyDeleteLove your journal - the colors are so fabulous and all the elements work so well together. So nice to be able to highlight your current favorite.
ReplyDeleteSticky back embossed????Wonderful idea, I'll try this! Your work is so beautiful, I love the touch of yellow! Great project as always! BArbarayaya
ReplyDeleteYou are SO clever with that embossing trick...love it! Great minds must think alike bc when I saw this challenge in the CC book I knew I wanted to save it for my tags this year. Being the bee lover I am and the fact that I have this die you know what my book will look like for 2015. :) I'm going to CASE this big time (hope you don't mind). Putting a tag within a frame on the cover was brilliant Cheryl. Thanks for the inspiration! xx
ReplyDeleteSo cool Cheryl! I like how you attached the ring binder, and the "stay brave" stamp is pretty nifty!
ReplyDeleteGreat place to store your tags Cheryl! I'm inspired!
ReplyDeletethis turned out so beautifully!! I love it.
ReplyDelete